Pages

Friday, September 28, 2012

Catching up...

Oh dear! It's been two weeks since my last post! What a terrible blogger I am...

But! Other aspects of life had taken over - namely, sewing! In the 12 days I've been selling costumes on Etsy, I've sold 6 things! That may not seem like a lot, but every little bit of extra money helps! Currently top on the list of things that extra money will go towards is a medical bill from the hospital when I had a my freak allergic reaction - and now I owe them $900. Great. Anyways, but God is providing and I'm getting to sew which I LOVE! I've also got sewing commissions from Rock Bridge for their Fall Festival and Dalton High for their fall musical. YAY!


Tim and I celebrated our 2 month anniversary today - well, "celebrated" by him working 16 hours. ;-) But tomorrow we're headed to watch Watts play football at the UGA vs. Tennessee game - Go Dawgs! It's crazy to think we've been married two months already; time sure flies when you're having fun!


And on that same Tim-is-amazing note, he decided a few weeks ago that he wanted to build a bench for our dining room table. We only have 4 chairs and I've always loved the whole "bench at the dining room table" look. So when he found gorgeous Queen Anne chair legs on sale at Lowe's for ridiculously cheap, he built a bench. From scratch. Like, with wood. He did a ton of research and bought strange sounding screws and planed, measured, sawed, and drilled. After a couple nights of work, he had made a bench! I forgot to take finished-finished pictures so you'll have to content yourself with in-progress pictures!

First, he collected supplies.


He measured a lot...


He did cool things to make the legs attach to the base he made...

And reinforced the side pieces of wood to the top...

And suddenly... A BENCH!

He stained it with some leftover stain (3 coats!)...

Looking SOOO great! We wanted to cushion the top, so that's where I came in! Foam we got for 40% off at Hobby Lobby...


We put a layer on top with about half an inch space on all sides:


Then did ANOTHER layer of foam that wrapped all the way over the edge and some fake leather we got on clearance at Joann Fabrics...


A few staples later and we had a cushioned bench!


I can't believe I forgot to take a picture of the bench at our table. I'd go take one now but I'm sitting at Chick-fil-A while Tim works an event until midnight. And now I'm contemplating a milkshake... hmm...

The next update (tomorrow or Sunday) will show the decorative pillows I "upcycled" for the bed and the new bed skirt AND the new furniture in the dining room. YAY!

Thursday, September 13, 2012

Living Room Reveal!!!

Remember what the old living room looked like?


Yup. Sky blue. The fake fireplace was about 3 different shades of off white. It just looked... well... not like a living room. Tim and I didn't want to spend much and we'd already spent $70 on 2 gallons of paint for the dining room. But I researched a little and found that Walmart has "Colorplace" paint for a whopping $10.94 per gallon (for flat paint). We decided to risk $22 and got a lovely pale green called Desert Aloe. Well, it was lovely until we got it home and painted a sample on the wall. NEON GREEN. Oh no! We'd already gotten 2 gallons and we weren't about to blow another $22. THANKFULLY, my friend Mary and Joanna were coming into town that night and they had the brilliant idea to tint the paint to a better shade of green. Mary poured both paint buckets together into a bigger bucket and then added red paint left over from the dining room. A few minutes later we had a *gorgeous* shade of pale green. What would I do without friends?! Anyways, so here is the new living room!!!

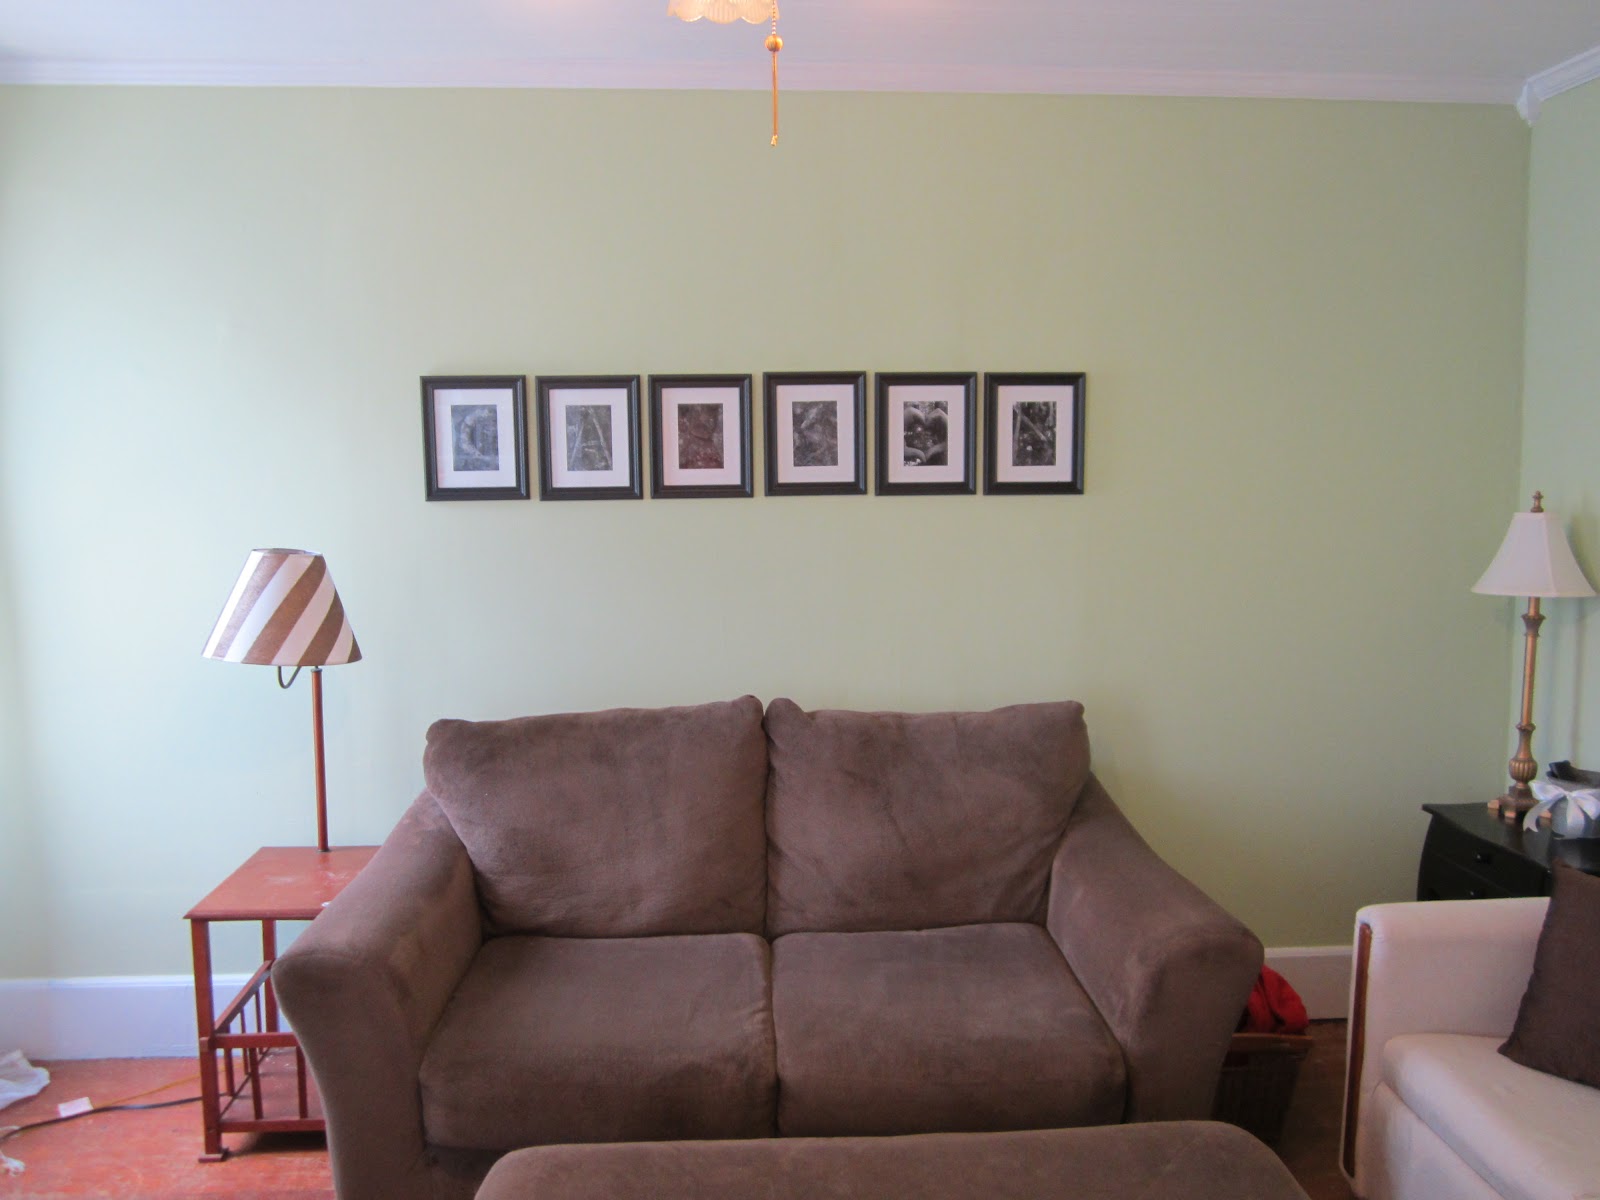
Isn't it lovely?! I already had the brown couch and giant ottoman and Tim had the pull-out sofa that we reupholstered back when we were dating. 


Tim already had that end table with attached lamp and he spray painted the shade in stripes. Isn't he crafty? =D Those picture frames are perhaps my favorite part of the room because they are so meaningful. Here's a closer look:

Yup, it spells CARSON out of nature and the best part was that Tim took all of the pictures when we were hiking in Acadia National Park on our honeymoon in Maine. It was so fun looking for the letters in nature - like a scavenger hunt of letters!


But, the pictures didn't always look so cute. My new decorating motto is Don't be afraid to fail. Here's my first attempt at hanging the CARSON pictures:
I had this idea to use kitchen knobs that I'd spray painted and tulle to hang mismatched frames I'd gotten at Goodwill and painted black. Well... I mean... I guess it worked, but it wasn't really the UMPH I had wanted. And Tim (who has only been completely complimentary about ALL of my decorating) nicely suggested that we should maybe splurge on bigger frames with mattings. I agreed and wasn't too heartbroken because I'd only spent $3.51 on the 6 frames. So we snagged some lovely BIG frames with mattings at Walmart for only $3 each. But that meant taking down all the knobs that I'd put so carefully into the wall with screws and anchors and everything! Oh well. Taking out the screws and anchors left big holes:


That's okay, though. Hammered it flat, then filled the hole with some drywall spackling. My favorite is the kind that goes on pink and dries to white when it's time to sand it. 


Once it was dry, I sanded it a little and painted it green and and voila! Like it never even happened. 

Don't be afraid to fail.

Anyways, I think the new frames look SO much better. Hooray! Here's the rest of the room:

I had this lovely wrought iron piece above my bed at my old house (on clearance at Hobby Lobby that was black and I had spray painted white a few years ago).

These were my matching bedside tables from my old house (half off at TJ Maxx because the corners were scuffed). And the matching buffet lamps I got for $15 each at a consignment shop here in Milledgeville. And I found that bucket in our shed - after a thorough washing and a satin bow, it's perfect for holding remotes.


Our TV sits in front of the fake fireplace (which I painted white-white), and above it is a mirror that I had already (I bought it black, spray painted it silver for my old house, and then spray painted it bronze for this house with leftover paint from the kickplate on the front door).


And the built-in bookshelf look so much better all white. Hanging beside it is the lovely chalkboard frame that a new sister-in-law made for our wedding. So gorgeous, Angie!!!


Mom had given me these curtains forever ago and the rods I had at my old house.


I'm *loving* the wrought iron over the sofa. Oh, and those brown throw pillows Tim spotted at Bed, Bath and Beyond on sale for $5 each. Score!


Total cost for the whole room:
  • $22 for neon green paint
  • $18 for new frames
  • $7.73 for 6 5x7 photos from Walgreens (found a 40% off coupon)
  • $30 for new lamps
  • $10 for new pillows
Grand total of $87.73 for the entire room. This is my new favorite room in the house!!!

Check back soon for more pictures of the updates to the dining room!

Saturday, September 8, 2012

Make Your Own Bisquick

Bisquick is perhaps our most used ingredient in the Epic Carson household. We've been married all of 6 weeks and I've already used it to make plenty of biscuits, pancakes, and cheddar cheese biscuits. Tonight we're having friends over to watch the UGA vs Missouri game so that calls for snacks! And we actually had all the ingredients for Sausage Cheese Balls. YUM! Except we were a little short on Bisquick. I had been wanting to make my own after figuring it could be that hard and Bisquick isn't cheap. So after scouring the internet I made some!

If you take a look at the side of a Bisquick box, you'll see there aren't many ingredients. Flour, Partially Hydrogenated Oil (shortening), Leaving (baking soda), Dextrose (sugar), and Salt. 


So, using this recipe I made my own. Add all the dry ingredients (and I did totally add a tablespoon of sugar) and whisk together (so much faster than sifting!).


Add the shortening and cut in using a pastry cutter until mix resembles course meal. You could also use a food processor but I didn't want to get mine out. It took me about 2-3 minutes to mix it all in. 


Looks pretty good!


Store in an air-tight container. (I used this one that was left behind from the people who own our house.)


Ta-da!!! I'm making up the sausage balls shortly and I'll let you know how the baking mix turns out!


Wednesday, September 5, 2012

Sentimental Thought of the Night...

It's finally hit me. Five and a half weeks into marriage and I've had that "A-ha" moment. It happened tonight: combine me not feeling well with not being able to get to sleep with my husband's snoring being triple the usual volume and I got the epiphany:
"This whole marriage and husband thing isn't exactly what I had imagined."

And then I had a second epiphany: "It's so much better."

God has so richly blessed me over this past year. Tim and I haven't even known each other a year yet (we met on eHarmony last September 23rd) but these have been the most joyous 11 months of my life. Love and marriage is so much more than my 16-year-old self could have ever dreamed. Marriage isn't just having a guy that promises to be with you for forever. It's having a partner to watch new TV shows with. It's having a new family member that uses his off day to drive to Dalton to visit my family. It's having an arm around my shoulders at church. It's having an extra pair of hands to help paint the living room. It's having a selfless worker that mows our yard on his off day. It's having a cute guy to kiss at red lights. It's having unconditional love when I least deserve it. It's having a man that can't wait to have kids of our own so we can be ridiculously strict parents. It's having loving ears to listen to me wax on and on about silly things. It's having a husband that gets up before the sun to go to work and never once complains. It's having someone to grow with, laugh with, cry with, celebrate with, dream with and simply *be* with. I'm so glad I didn't know marriage would be this amazing because I would have been so much more anxious to find my "one"! I can't wait to tackle all life has to throw at us with this man at my side. DeLancey and Tim - taking on the world together. Tonight, *that's* what being the Epic Carsons means.

Sunday, September 2, 2012

A Tardis in our Living Room...

People who know me know that I like the TV show Doctor Who. It's a British sci-fi show about a time traveling alien. And it's awesome. It's currently in it's 7th season (which in fact started tonight - September 1st). Of course I forced Tim to watch a ton of episodes and he started to like it quite a bit too. So last week we were sitting in our living room having just watched an episode and getting all excited about the upcoming season when Tim had a brilliant idea. "Let's paint the living room doors into a TARDIS!" For the non-geek readers, a TARDIS is the "spaceship" used in Doctor Who. It looks like this:
It's modeled after real Police Boxes from the 1920s in London. Anyways, the french doors to our living room were in pretty bad shape. They were half painted a fading white and half raw wood. Yikes. You can sorta see them in the background on the left here:

Well, we primed and then painted. Tim cut boards to place on top and a board for the call box area. I found handles on clearance at Hobby Lobby and we already had the light. Then the very epic Joanna Jinright just so happened to be coming down to spend the night so we begged her to paint the POLICE BOX letters. She free-handed them. She's amazing. 

So here's our Tardis French Doors! We are so proud of them!!!


To add to the illusion of looking inside the Tardis, Tim used scrap window framing he found in our shed (which he excellently cut to size) and then put contact paper on the other side of the glass to make it "foggy" so you can't see the magical spaceship inside.


Police boxes used to have phones so you could call the police and so we created a faux door where the phone would have been. Tim cut the wood and painted it and then we printed off the wording from the internet. Oh, and found hinges to add to the effect!


Seriously, isn't Joanna amazing??? The lettering looks beyond perfect!


This was our motion activated light that Tim had the great idea to use as the beacon on top. He even painted the plastic parts with the same National Blue Velvet paint!


So that's what our living room doors look like now!!! Check back soon to see what the inside of the living room looks like!!!